IronCAD 3D Modeling Fun!
No Sketching Please!
Those Intellishapes are Cool!
I saw this great simple part that requires no sketching.
When I introduce IronCAD’s very flexible design paradigm I have a hard time to get the Pro/e clone users, like Solidworks and other programs to understand the drag and drop design paradigm.
IronCAD Drag and Drop is based on primitive shape design but uses much more sophisticated Intellishapes available in a standard or custom catalog. It is the only integrated history/direct edit MCAD system. You usually use start with drag and drop functionality then you have the option of sketching, direct edit or surfacing when required, making it the most flexible modeling system.
Watch how fun this is with drag and drop, shell and editing an intellishape. A totally different, more productive and much more “fun” to do!
Learning IronCAD! Lesson 1
Setting up the Scene (Workspace)
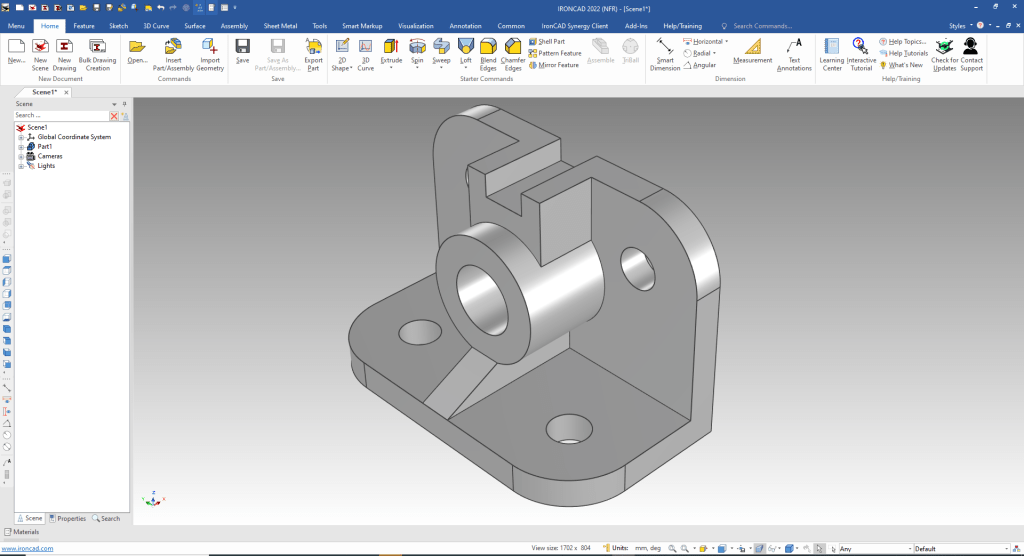
Here is the drawing!

Download IronCAD and follow along.
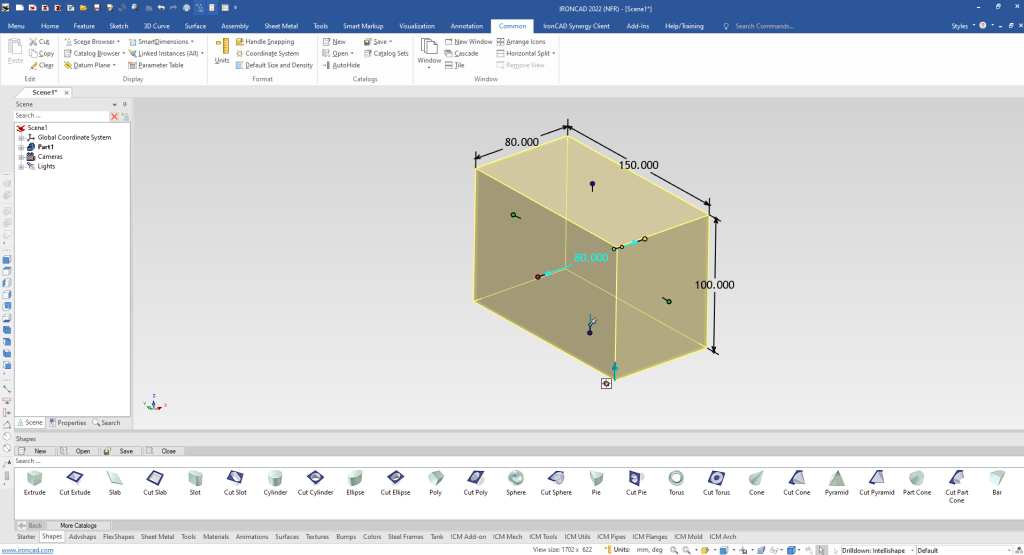
We will set the units to MM and drag and drop an Extrude (block) from the Shapes catalog into the scene and size it to 150 x 100 x 80. It automatically inserts the Intellishape to X0Y0Z0.
Learning IronCAD! Lesson Two
Drag and Drop Design
Designing with Shapes
When you work with shapes you operate with a different paradigm. We will now shell the block to 13mm thickness. We select the faces that will be open.
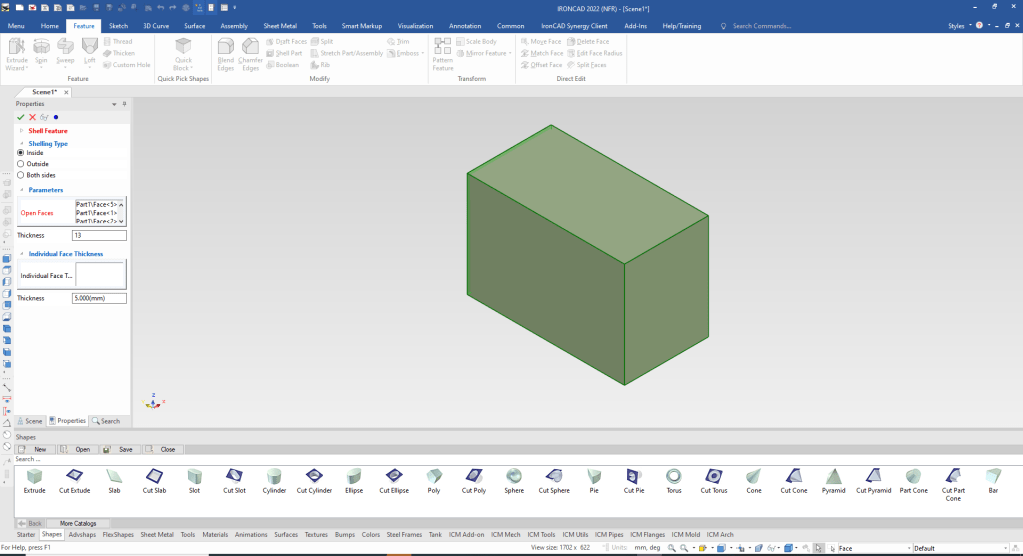
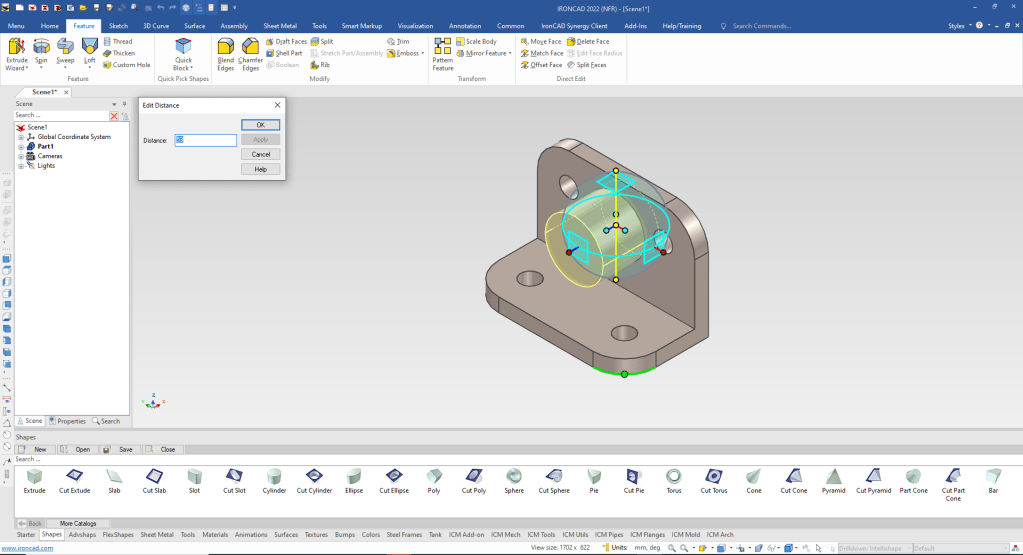
We select okay and you see we have the basic shape. We will now create the 30mm blends.
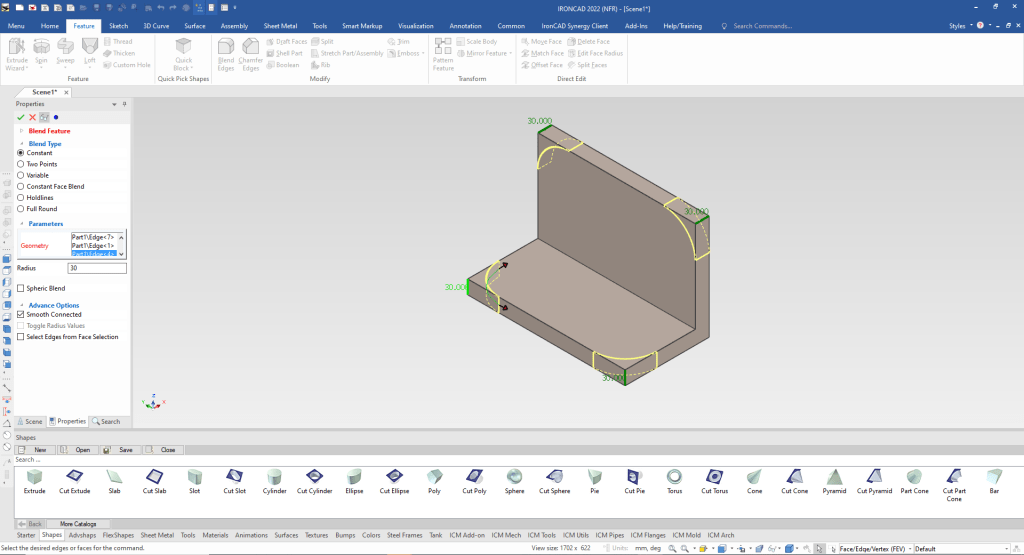
We can now use the center points of the blend to drag and drop one of our holes. We the use the triball to copy link the other holes. This allows us to change all the holes with one selection.
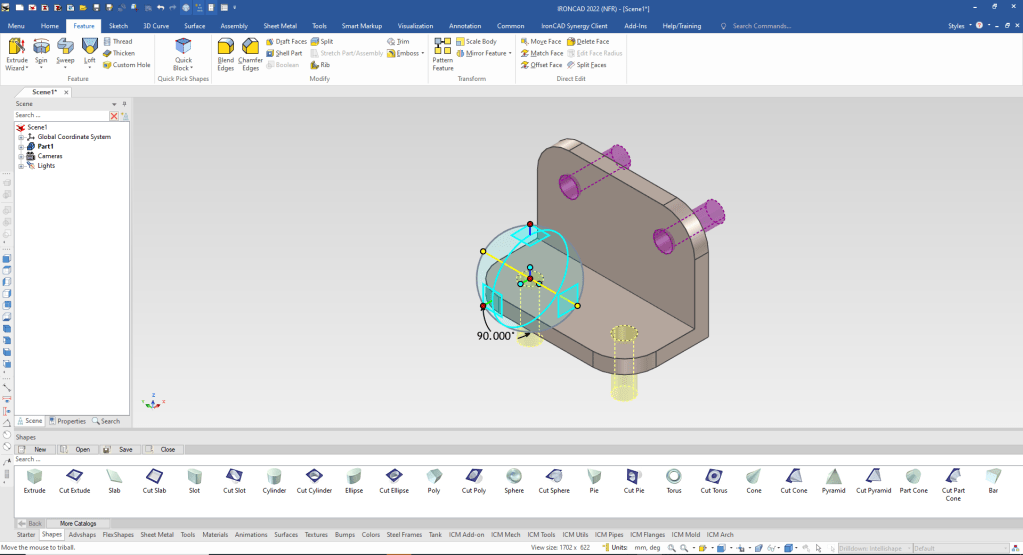
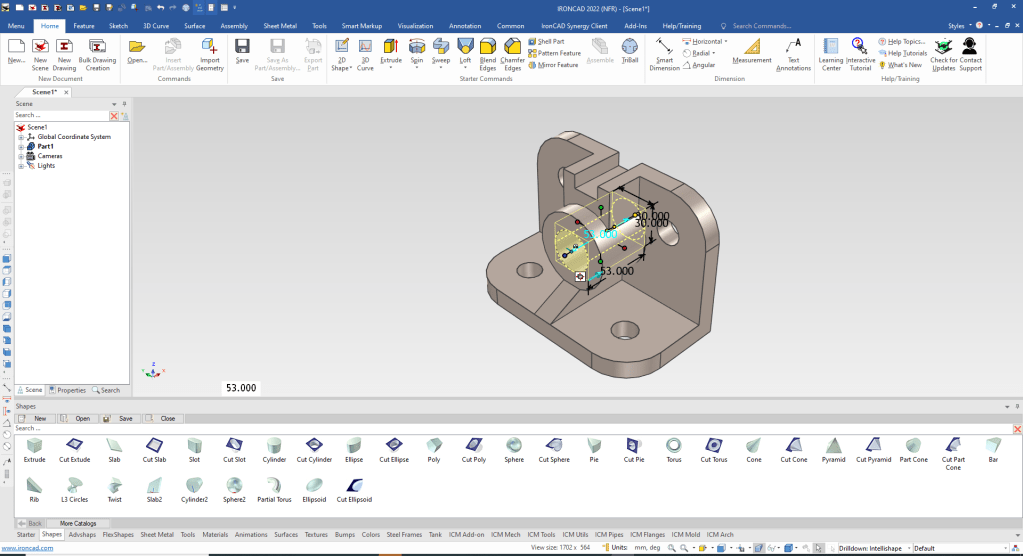
We drag and drop a cylinder to a center point on the back wall, size it, pull it to the back face and set the depth to 53. We then using the triball we set the location by using the triball function distance from a point.
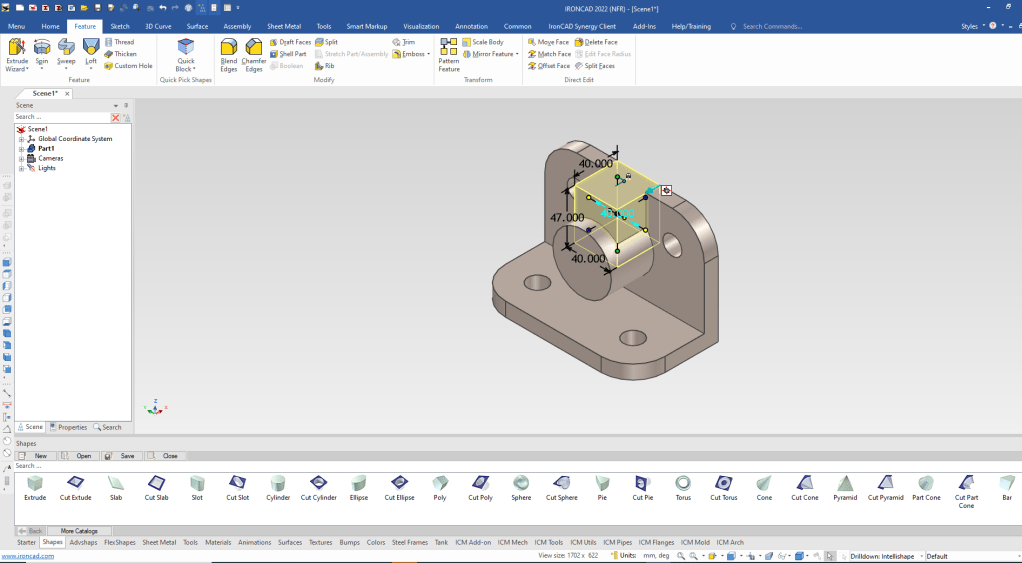
Now for the top block. We drag and drop block to as center point on the front faces, pull it to match the back face and top face and size the depth and then set the symmetry option and size the width.
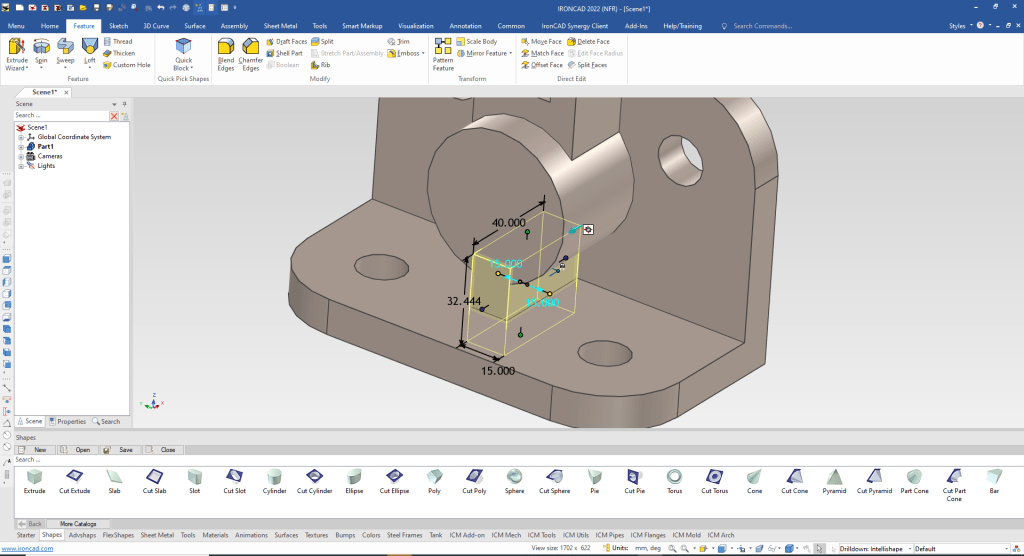
We drag and drop a cut extrusion on to a center point on the front face pull to match the front and back set the depth and again select the symmetry option and set the width.

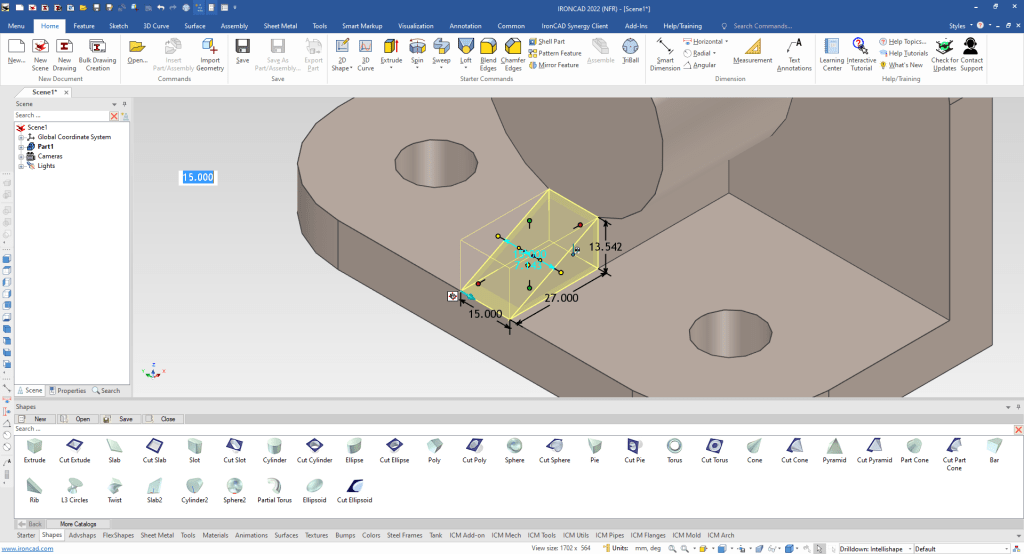
Now for the bottom rib. We drag and drop a extrusion block pull the top and bottom into the existing faces, then pull to match the front of the cylinder and then size the width.
We drag and drop a rib on to the face of lower rib and pull the handles to match the related features.
The last feature is our hole. We drag and drop a cut cylinder to create our center hole.
We are done with our model. Lets set a higher resolution for a better looking model.

You many be interested in what makes up the Intellishape.
Learning IronCAD! Lesson 4
IronCAD Intellishape Deconstructed
What are we Dragging and Dropping?
We have some great lessons comparing IronCAD and ZW3D to other popular modeling systems using Feature Based Modeling and Streamlined Sketching.
3D Modeling Techniques Defined
Please feel free to stop by our website below for a variety of articles on the State of our Industry, interesting articles on 3D CAD Productivity and a few of our projects!

Viewpoints on Today’s 3D CAD and Engineering Industry
TECH-NET Engineering Services!
We sell and support IronCAD and ZW3D Products and
provide engineering services throughout the USA and Canada!
Why TECH-NET Sells IronCAD and ZW3D
If you are interested in adding professional hybrid modeling capabilities or looking for a new solution to increase your productivity, take some time to download a fully functional 30 day evaluation and play with these packages. Feel free to give me a call if you have any questions or would like an on-line presentation.
For more information or to download IronCAD or ZW3D
Joe Brouwer
206-842-0360
